

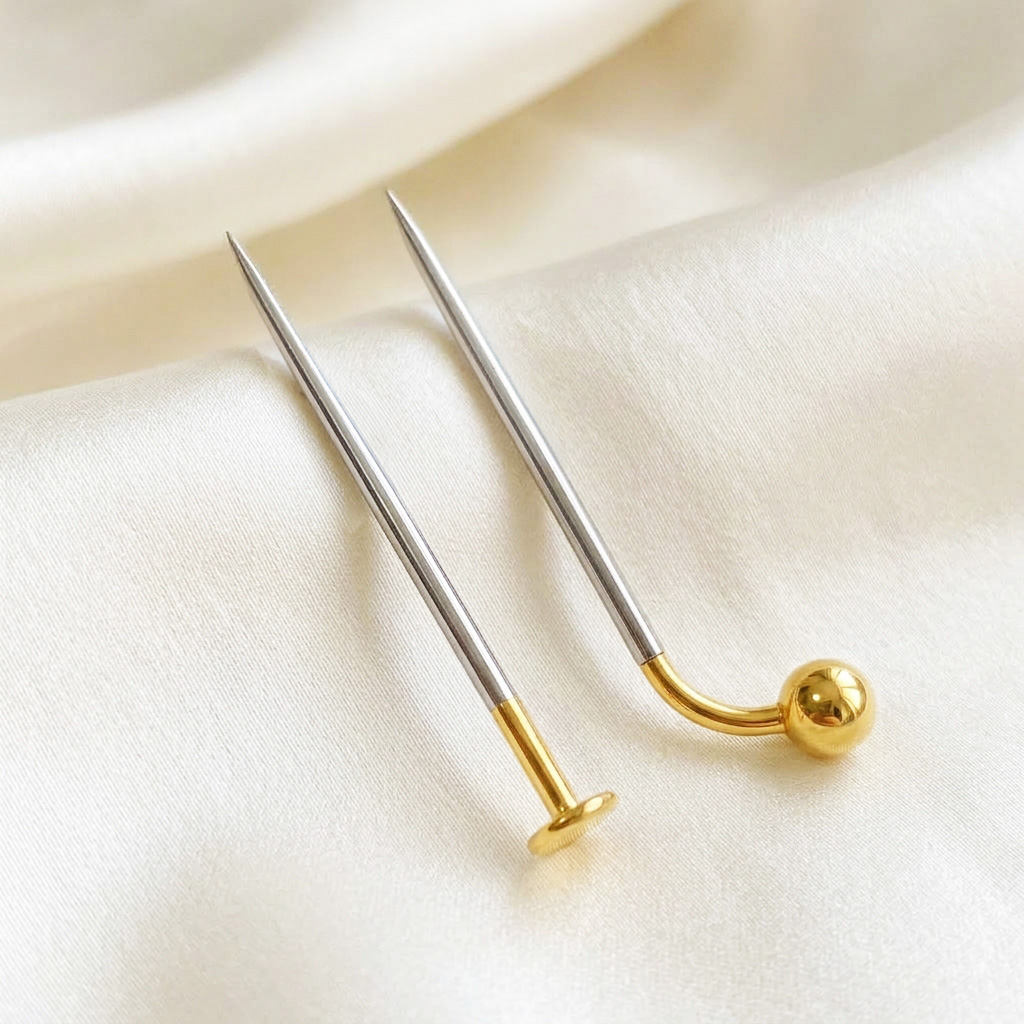
In brief
A taper is a tapered tool that helps a piercer guide jewellery into an existing channel. It is not jewellery to leave in a piercing and should not be used to force a larger size through. Stop the procedure if passage requires pressure, causes significant pain or leads to bleeding.
What is a taper in body piercing?
In piercing terminology, a taper is a tool with a gradually narrowing profile. The narrower end enters first; the other end is sized to guide the jewellery or connect to an insertion system. Its purpose is to provide a controlled transition between the channel and the jewellery, not to create space by applying force.
A taper may be used to insert jewellery into a new piercing when the method and anatomy call for it, or to reinsert jewellery into a healed channel that remains open but has narrowed. In either case, it remains a professional’s tool: the model, size and technique depend on the jewellery, placement and manufacturer’s instructions.
Rule of thumb: a taper should make an already possible passage easier. It should not use force to make an impossible passage seem “possible”.
What it does—and does not do
| Appropriate use | Inappropriate use |
|---|---|
| Guiding jewellery through an existing channel with a smooth transition. | Forcing oversized jewellery through because it “should fit somehow”. |
| Helping a piercer transfer a labret, barbell or other compatible piece of jewellery. | Using an arbitrary size without checking diameter, gauge, length and connection system. |
| Assisting with a reinsertion assessed by a professional. | Leaving it in place as though it were a stretcher or a piece of jewellery. |
| Making insertion more predictable when the technique calls for it. | Masking resistance, pain, tearing or bleeding. |
The word “taper” is sometimes also used for conical jewellery, such as spirals, talons or decorative taper pins. This overlap can cause confusion: an insertion taper and tapered jewellery do not serve the same purpose. According to the Association of Professional Piercers (APP), tapered jewellery should not be worn to stretch a piercing.
Taper types and compatibility
There is no universal taper for every procedure. Common models differ in profile, size, length and how they connect to the jewellery:
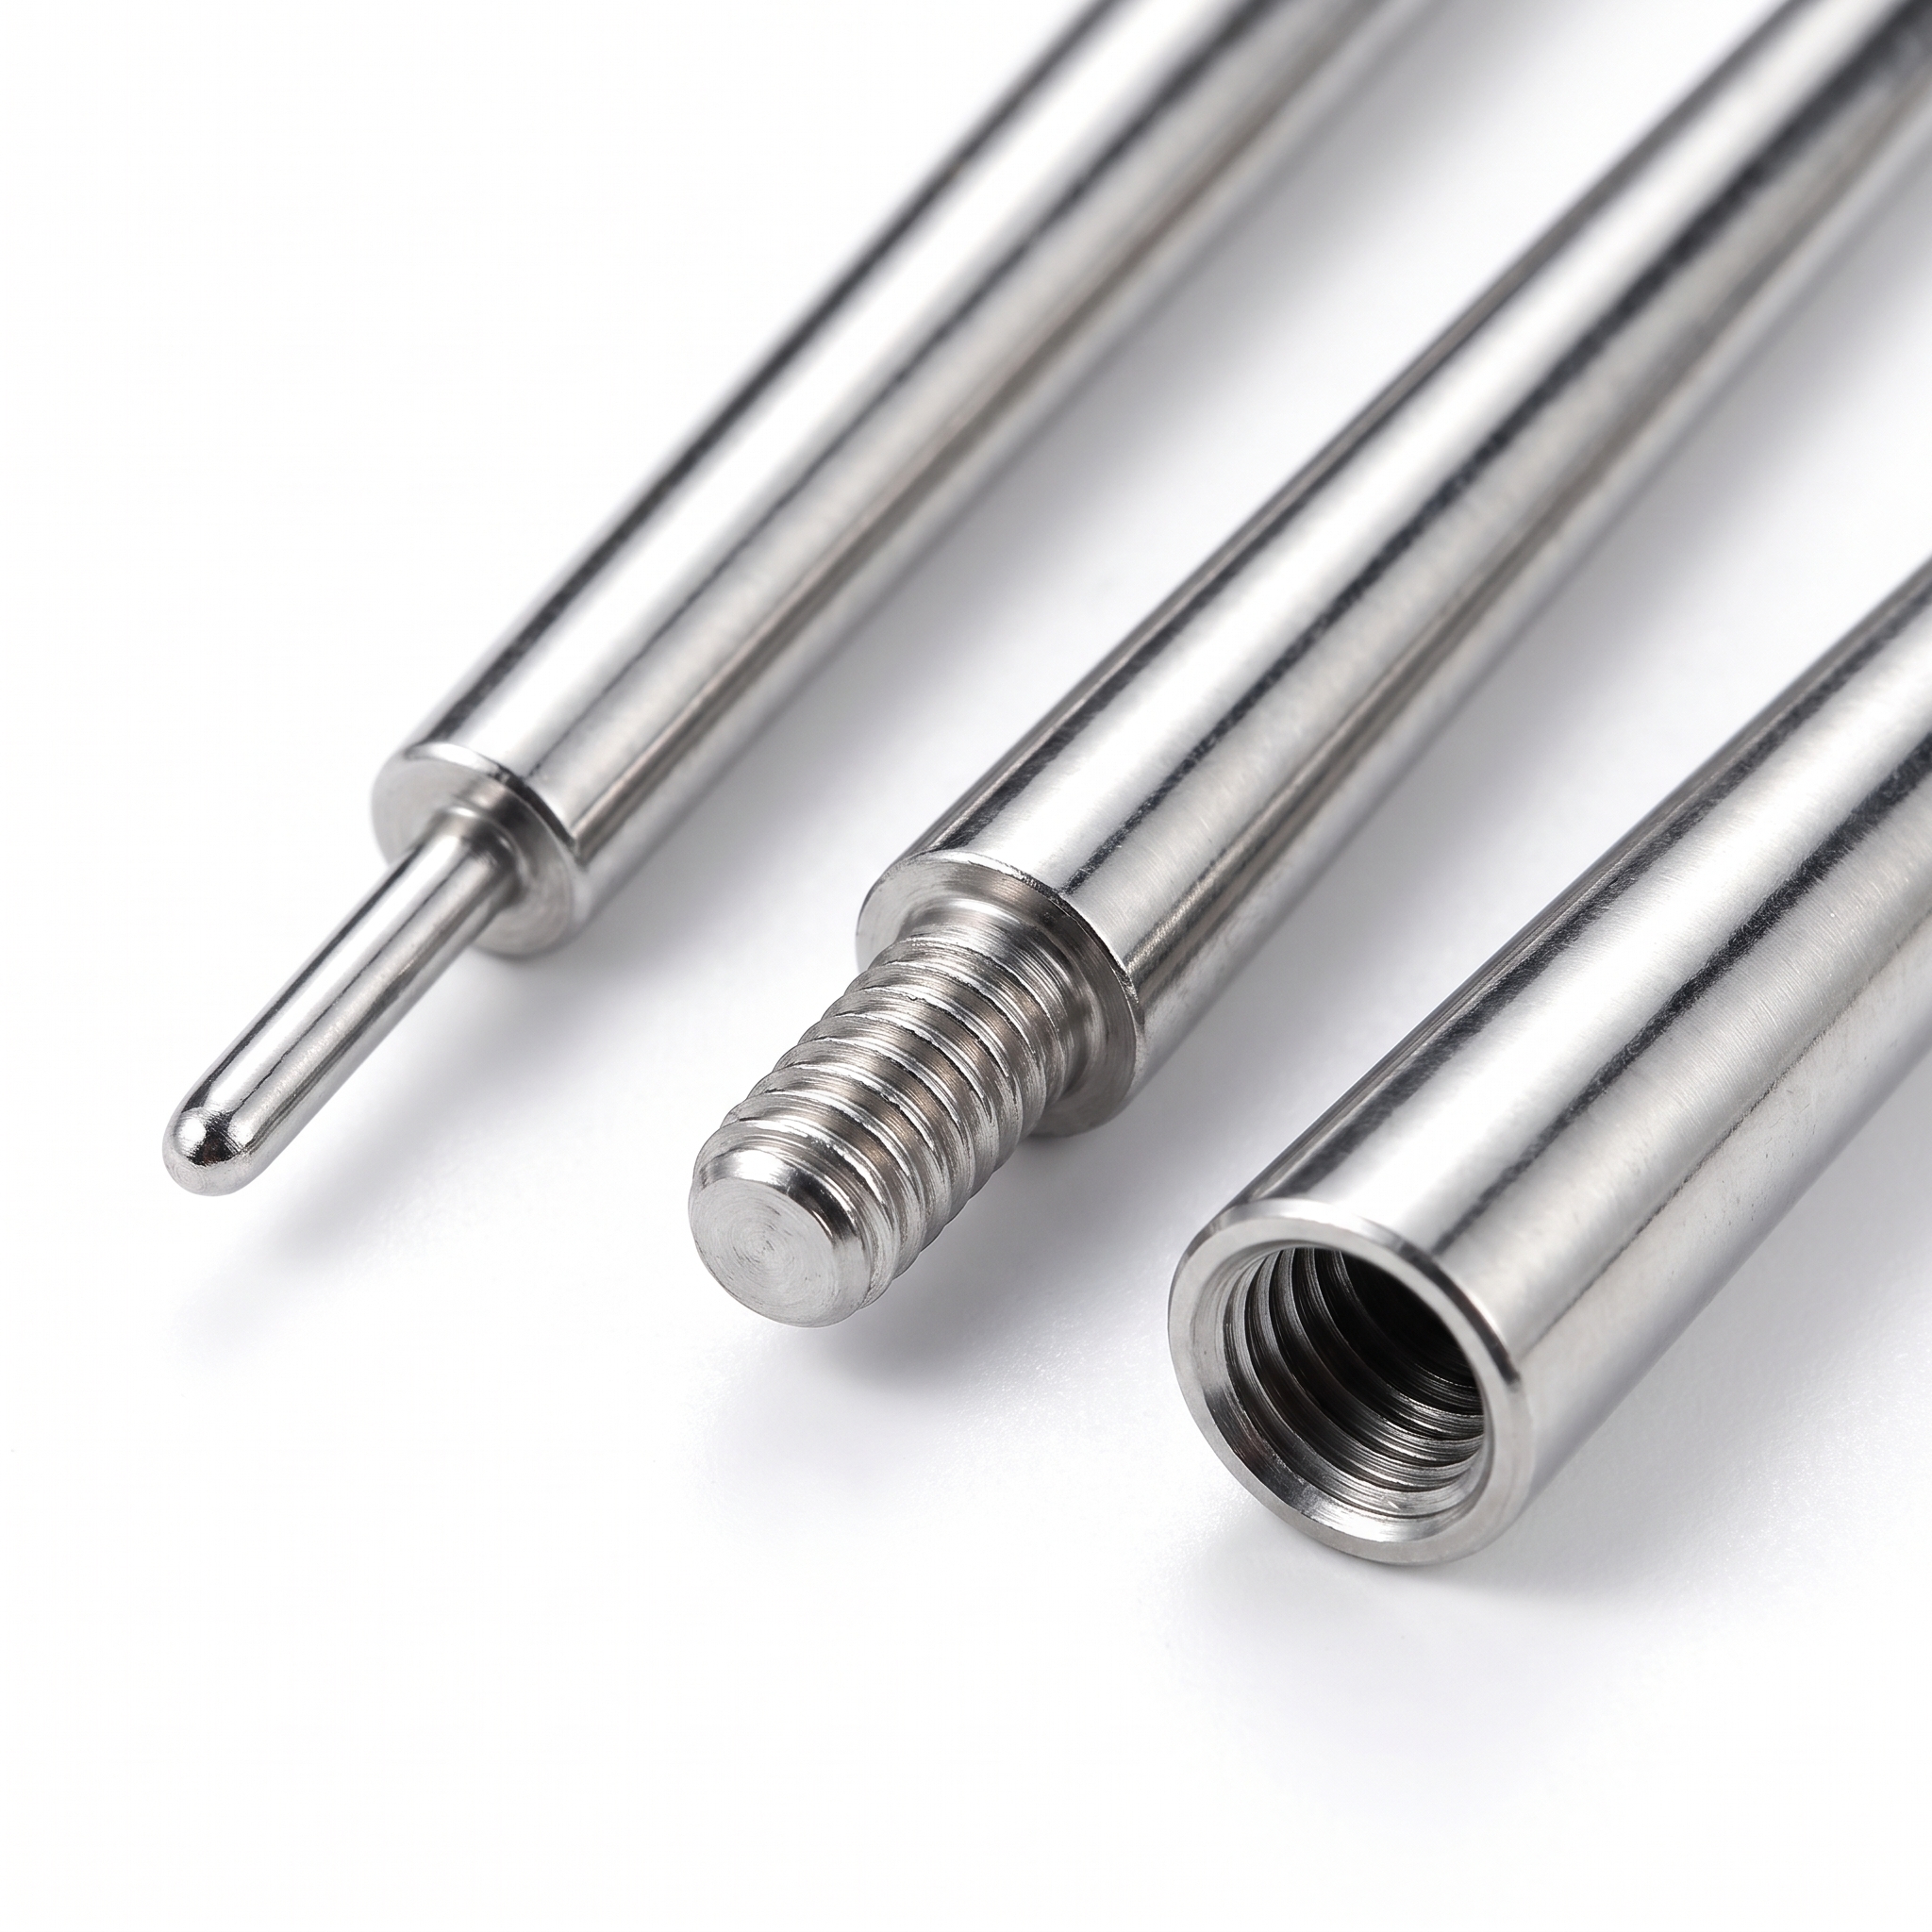
The connection matters: push-pin, internally threaded and externally threaded systems require compatible fittings. For a healing piercing, the surface passing through tissue must remain smooth; do not choose a taper just because it is conical.
- Pin taper: a tapered pin mainly used to guide threadless jewellery into place when the size and system are compatible.
- Tapers for threaded or concave systems: tools designed to transfer specific jewellery using its connection system. Product names and exact methods may vary between manufacturers.
- Reinsertion tapers: tools selected by a piercer to follow the channel and guide jewellery back into place without repiercing, when the channel remains present and the procedure is appropriate.
These categories describe function; they are not a licence to improvise. Before use, check jewellery size, mechanical compatibility, finish, absence of scratches or burrs, and the manufacturer’s instructions. To compare available systems, see our titanium push-pin tapers and internally threaded titanium tapers; the choice must remain compatible with the jewellery, placement and piercer’s protocol.
A taper does not replace proper jewellery selection. Jewellery should be appropriately sized for the anatomy, have a smooth surface and use a material suited to the circumstances. For a newly stretched piercing, the APP recommends jewellery suitable for a fresh piercing and, as a style, single-flare or non-flare plugs; the choice should still be individualised.
When it may help—and when not to use it
Reinserting jewellery into a healed piercing
A healed piercing can narrow quickly, even after jewellery has been removed for a short time. If the channel is still open, a piercer may assess whether to use an insertion taper and, if needed, a smaller size before returning to the previous jewellery. This is not the same as repiercing; the decision depends on examining the channel and how it responds.
Transferring jewellery during a procedure
In some techniques, a taper helps maintain alignment between the needle, channel and jewellery. Its use should be covered by the studio’s protocol and the piercer’s training. A sterile, compatible taper may reduce unnecessary handling, but it does not remove the need for an organised work area and anatomical assessment.
When to stop
Do not use a taper to overcome an obstruction. Stop if the jewellery does not pass with minimal resistance, the angle feels unnatural, the tissue appears fragile or significant pain occurs. Reassess the size, healing, alignment, material and swelling, and consider postponing or seeking medical advice.
Professional use: a controlled sequence
The exact procedure depends on placement and jewellery, but a checklist can help prevent a technical aid from becoming an instrument of force:
- Assessment: check that the piercing is suitable for a jewellery change or reinsertion. A painful, irritated, unhealed piercing, or one with unusual discharge, should not be treated as a ready channel.
- Sizing: check gauge or millimetres, length, diameter and the jewellery’s connection system. A larger-than-needed taper is not a shortcut.
- Preparation: use clean or sterile tools and jewellery according to the studio workflow, including packaging, indicators and manufacturer instructions where applicable.
- Inspection: inspect the tip, surface and connection. Scratches, burrs, residue or uneven edges may injure tissue.
- Insertion: maintain alignment, use a lubricant appropriate to the protocol and guide the jewellery without abrupt movements. Do not leave the taper in the channel.
- Stop and reassess: stop at the first sign of abnormal resistance, significant pain or bleeding; do not “try harder”.
- Final check: check that the jewellery is secure, not too tight, suited to the anatomy and properly fastened. Provide aftercare instructions and record the change according to studio procedures.
For threadless jewellery, a pin taper may help guide the post when the size, finish and system are compatible. What matters is continuity of the surface passing through the tissue and compatibility with the jewellery—not simply using any cone-shaped tool.
Tapers and stretching are not the same
Stretching is the gradual, intentional enlargement of a mature, healed piercing. An insertion taper, by contrast, is an aid for passing jewellery through. Confusing these functions can lead to skipped sizes, compressed tissue or treating resistance as normal passage.
The APP’s stretching guide states that there is no universal timetable: after each increase, tissue may need weeks, months or longer to recover and stabilise. The next piece of jewellery should enter with little or no effort. The APP advises against increases of more than one full gauge size and recommends smaller increments, especially as the difference in millimetres grows.
A long or sharply tapered tool is therefore not a safe way to “make room”. Its wider end may advance while stretching the tissue beyond its capacity, causing microtears, scarring, thinning or a blowout. A temporarily successful result does not show that the procedure was safe or that the channel will remain healthy.
For controlled stretching
- the piercing is fully healed, mature and not irritated;
- the increase is small and suitable for the placement and tissue;
- the jewellery is suitable for a newly stretched piercing and has a smooth surface;
- there is no significant pain, tearing or bleeding;
- allow sufficient time before the next step; do not follow a rigid timetable;
- seek a piercer’s assessment if placement, size or piercing history raises concerns.
Spirals, talons, decorative taper pins and other tapered jewellery are not substitutes for a stretching plan. O-rings or the jewellery’s shape may maintain pressure on tissue and contribute to irritation or thinning. A professional taper is an insertion tool, not jewellery to wear.
Common mistakes and warning signs
“If it hurts, just push slowly”
No. Some procedures may cause a mild stretching sensation, but significant pain, tearing or bleeding means you should stop. The APP guide identifies bleeding and visibly torn tissue as signs of overstretching or trauma.
“The taper can stay in until tomorrow”
An insertion taper is not automatically safe to wear as jewellery; its shape, finish, connection and retention may be unsuitable. Its job ends once the jewellery is in place.
“It is healed because it no longer hurts”
The absence of pain alone does not prove that a channel is mature. Consider the time elapsed, placement, any discharge or crusting, tissue stability and the overall assessment.
When to seek medical care
A piercer can recognise many technical issues and may recommend downsizing or pausing, but cannot diagnose medical conditions. Significant or increasing swelling, marked warmth, worsening pain, pus, fever, red streaks or feeling unwell require healthcare assessment. Do not remove or reinsert jewellery yourself to “let the area breathe” without professional advice.
Cleaning, sterilisation and traceability
A reusable taper that contacts tissue or blood must be managed as part of the piercing-instrument workflow: safe collection, decontamination, cleaning, inspection, packaging where required, and sterilisation using a validated cycle compatible with the device and the manufacturer’s instructions. Sterilisation does not remove residue, burrs or repair a damaged finish; cleaning and inspection come first.
The CDC describes sterilisation as part of a system that includes decontamination, disassembly where required, packaging, loading, monitoring and cycle quality. For body piercing, theAPP clearly distinguishes decontamination from sterilisation and requires the method to be appropriate for the items the studio reuses.
Keep available documentation for purchased devices and follow the manufacturer’s instructions; do not assume that every material, adhesive or component can withstand an autoclave. Use single-use instruments once and dispose of them according to local rules. Recording the batch, cycle and operator, where required by studio protocol, makes the process traceable.
For more on steam, cleaning and cycle monitoring, also read the MyPiercing guide to autoclaves.
Frequently asked questions about tapers
Can I buy a taper and use it at home?
This is not good practice. The tool’s shape alone cannot assess healing, anatomy, correct sizing or sterility. For a difficult jewellery change or possible stretch, consult a qualified piercer.
Is a taper used to increase the size?
Not automatically. A taper may be used as part of a professional stretching procedure, but it should not be used to force a size jump. Stretch gradually, only in a healed piercing, with appropriate jewellery.
What is the difference between a taper and a plug?
A taper is a tapered insertion tool; a plug is jewellery, generally cylindrical, that may be worn in a stretched piercing. A single-flare or non-flare plug is different from a taper and does not serve the same function.
Should the taper be the same size as the jewellery?
The size and connection must be compatible with the jewellery and procedure, but should not be chosen by eye. The piercer checks gauge or millimetres, profile, length and transfer system; if in doubt, do not force it.
What should I do if the jewellery will not pass?
Stop. Do not apply increasing pressure or replace the taper with a spiral or improvised object. A professional can check whether the channel is narrowed, irritated, misaligned or not ready, and decide on the safest next step.
Quick studio checklist
- The client understands the difference between an insertion tool and tapered jewellery.
- The piercing has been assessed and the procedure is appropriate.
- The size, placement, anatomy, jewellery and taper are compatible.
- The tool’s surface is intact, smooth and free of residue.
- The device is single-use or has been reprocessed under the validated protocol.
- Passage requires no abnormal force; otherwise, stop the procedure.
- Remove the taper once the jewellery is in place.
- The client receives aftercare instructions, warning signs and any follow-up advice.
Conclusion
Used appropriately, a taper can help make insertion more precise. Used as a stretcher, as jewellery or as a way to overcome resistance, it can cause avoidable trauma. Competence means knowing when to use it, when to change approach and, above all, when to stop.
For a client, the more useful question is not “which taper should I buy?” but “has my piercer assessed the channel, size, jewellery and protocol?” A careful, verifiable procedure without force protects the result better than any accessory.
Sources consulted
Institutional, professional and manufacturer sources consulted on 22 September 2026. Safety guidance is phrased cautiously; local rules and manufacturer instructions still apply.
- Association of Professional Piercers — Stretching: timing, increments, risks of overstretching, tapers as insertion tools and advice against wearing tapered jewellery to stretch.
- Association of Professional Piercers — Jewellery for Healed Piercings: reinsertion, channel narrowing and advice against forcing jewellery.
- Association of Professional Piercers — Jewellery for Initial Piercings: materials, finishes, surfaces and jewellery compatibility.
- NeoMetal — Guide to Threadless Jewellery: using a pin taper to insert threadless jewellery and the difference between smooth surfaces and external threading.
- CDC — Sterilising Practices: cleaning, decontamination, packaging and checking the sterilisation process.
- ISSalute — Piercings: what care and precautions are needed?: choosing a qualified professional, hygiene requirements and signs that warrant healthcare attention.
This article is for information only and does not replace assessment by a piercer or medical advice. Studio procedures must follow the operator’s training, device instructions and applicable Italian regulations.